Windows 11, the latest operating system from Microsoft, brings a fresh and modern user interface along with enhanced performance and new features. If you’re excited to try out Windows 11 and wondering how to install it, you’ve come to the right place. In this guide, we’ll walk you through the process of installing Windows 11 on your computer.
Before you start the installation process, it’s important to ensure that your computer meets the system requirements for Windows 11. These requirements include a compatible 64-bit processor, at least 4 GB of RAM, 64 GB of storage, DirectX 12 compatible graphics, and a UEFI firmware with Secure Boot capability. Additionally, your device needs to support TPM version 2.0. Make sure you’ve backed up your important data, as the installation process will wipe your current operating system.
Step 1. Prepare the USB Drive: If you haven’t created a bootable USB drive yet, you can follow the steps outlined in our previous tutorial How to make a Windows 11 bootable USB using Media Creation Tool.
Step 2. Boot from Installation Media Insert the bootable USB drive into a USB port on your PC. Restart your computer. As your PC boots up, pay attention to the screen for a prompt that says something like “Press [key] to enter boot menu” or “Press [key] for boot options.” Press the indicated key (usually F2, F12, ESC, or DEL) to enter the boot menu or boot options.
Step 3: Choose Boot Device Use the arrow keys on your keyboard to navigate to the boot options menu. Select the USB drive from the list of available boot devices. Use the Enter key to confirm your selection.
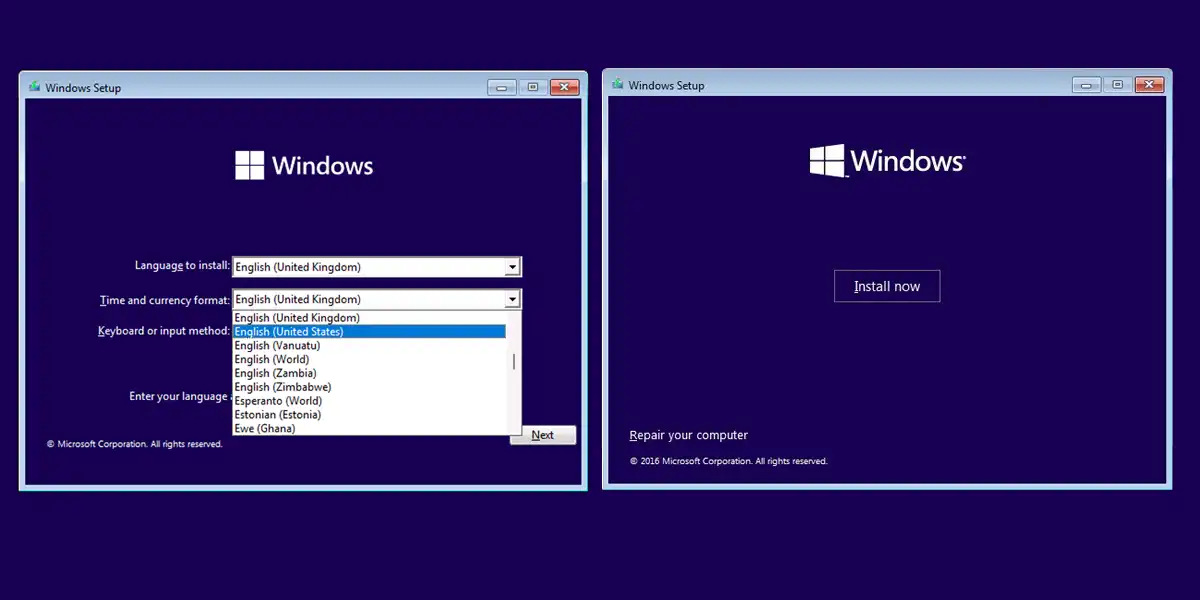
Step 4: Begin Windows 11 Installation Your PC will now boot from the USB drive and you’ll see the Windows 11 installation screen. Select your language, time, and keyboard input preferences, and click “Next.” On the next screen, click “Install now” to begin the installation process.
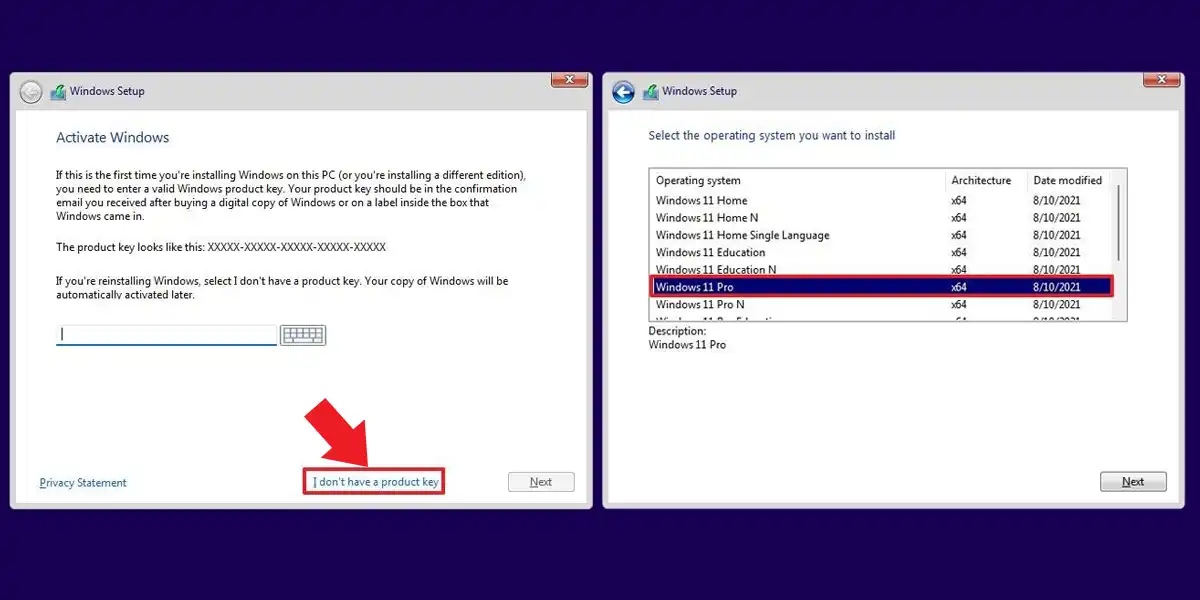
Step 5: Enter Product Key (If you have it). You can click “I don’t have a product key” and enter the key later. In the next screen select the Windows edition and click “Next.”
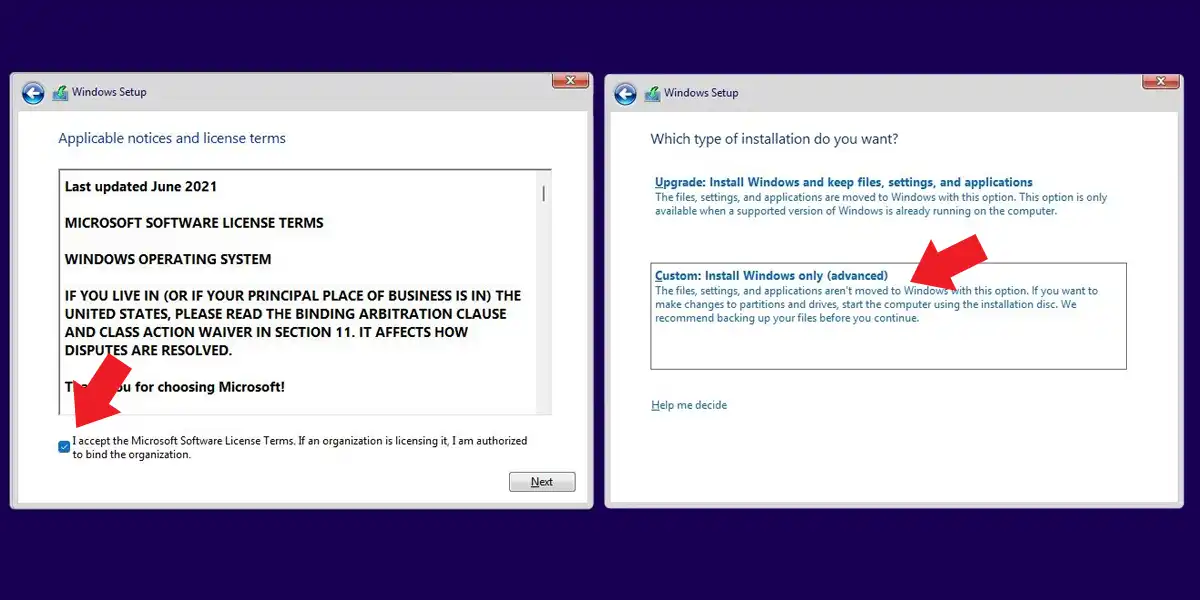
Step 6: Accept License Terms. Read and accept the Microsoft Software License Terms by checking the box. Click “Next.” Step 7: Choose Installation Type Choose between “Upgrade” and “Custom” installation. For a fresh installation, select “Custom.”
Step 8: Partition Selection.
You’ll be presented with a list of available partitions on your hard drive. This may include partitions from your existing operating system or previous installations.
If you wish to perform a clean installation and remove all previous data, select each partition one by one and click “Delete.”
Confirm the deletion for each partition. Be absolutely sure you have backed up any important data, as this action will permanently erase it.
After deleting all partitions, you should see a list of unallocated space. Select this unallocated space and click “New” to create a new partition for Windows 11.
Specify the size of the partition (or use the default size for the entire drive).
Once you’ve created the new partition, select it and click “Next.”
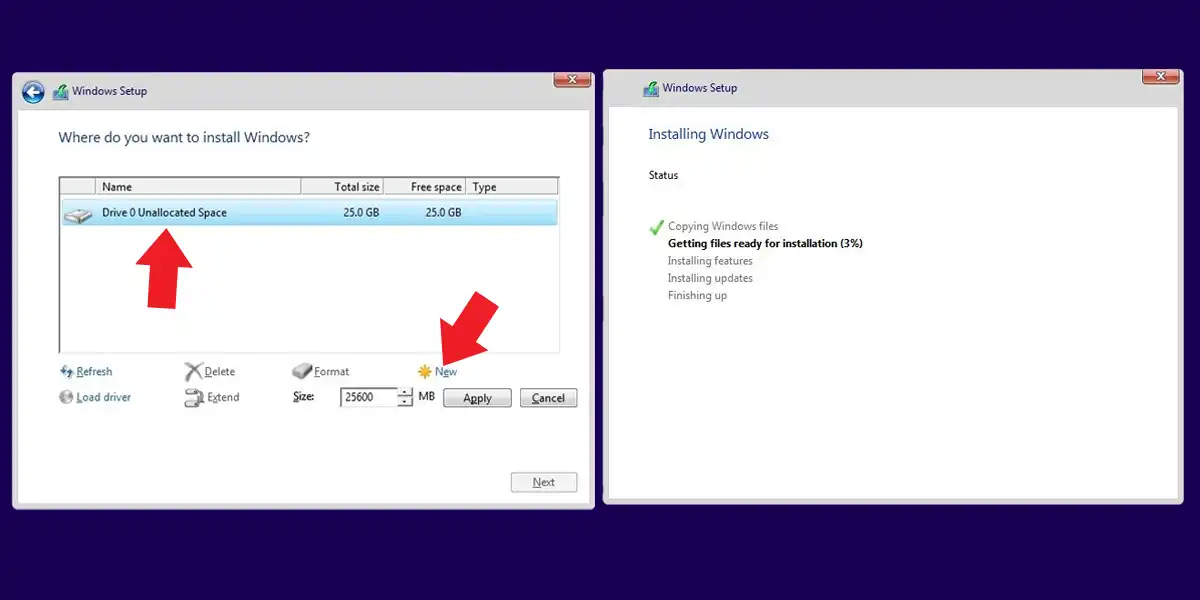 The installation process will begin. Your PC will go through several stages, including copying files, installing features, and updates.
Step 9: Set Up Windows 11.
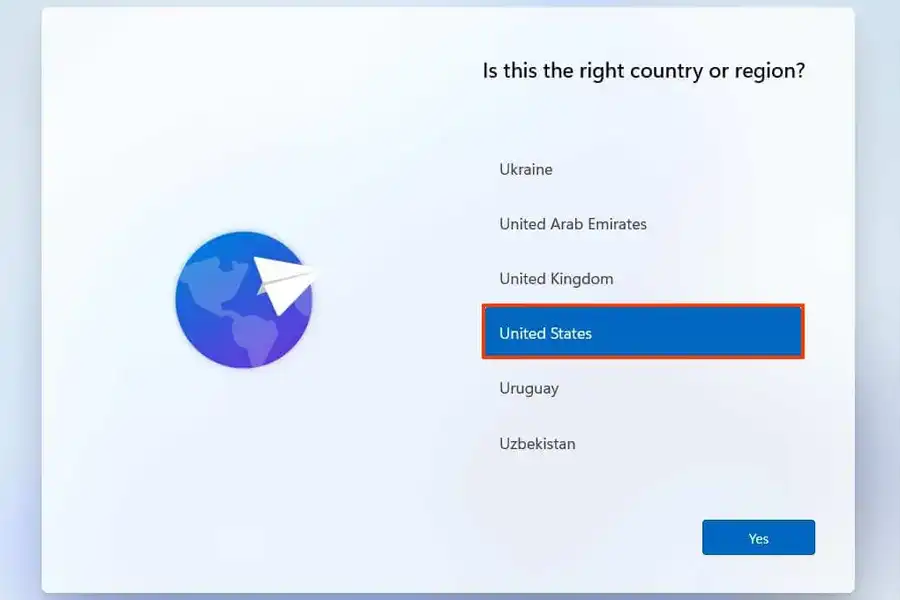
After the installation is complete, your PC will reboot. Follow the on-screen prompts to personalize your Windows 11 experience, including setting up your region, keyboard layout, and Wi-Fi network.
Choose your country or region from the list.
Choose your keyboard layout from the list.

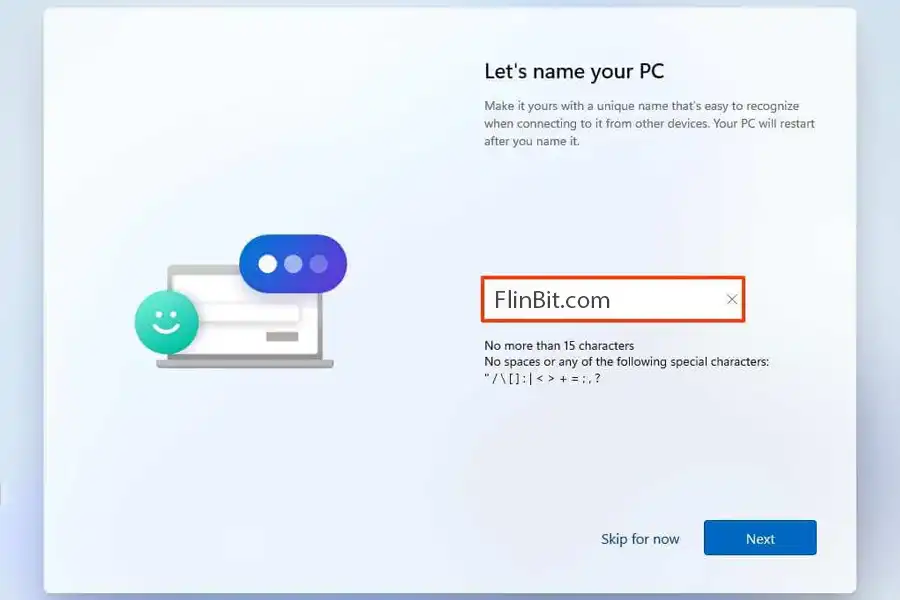
Give your PC a unique name (optional). Click the Next button or “Skip for now”. (The device will restart automatically.)
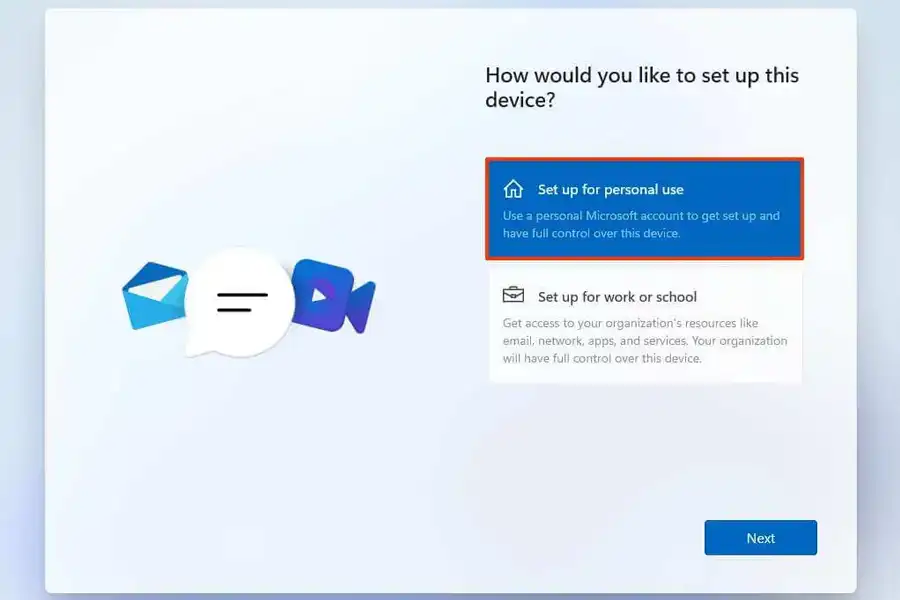
Select the “Set up for personal use” option if you are configuring Windows 11 Pro. The “Home” edition does not have this option. Click the Next button.
 Click the Sign in button.
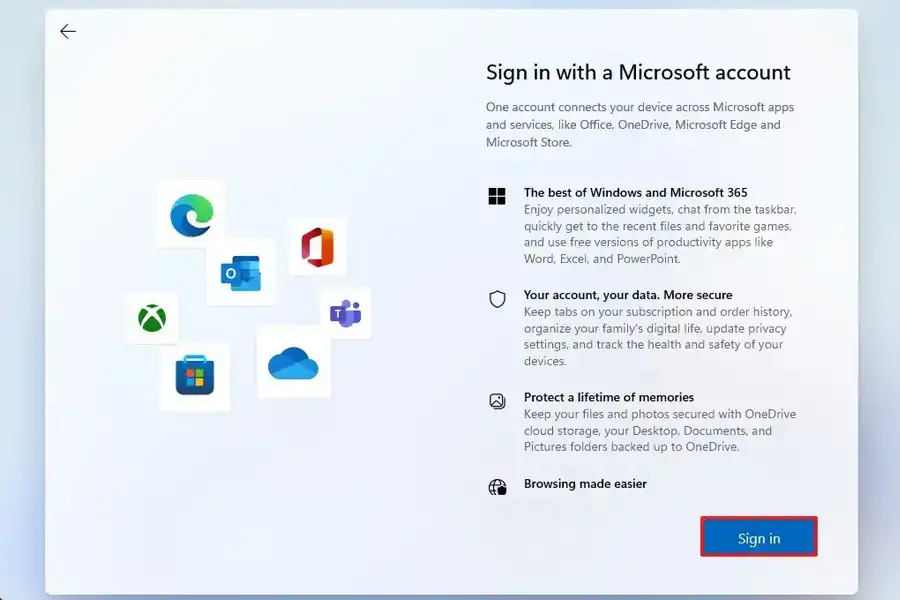
If you have a Microsoft account, enter your email address and password. This account allows you to sync settings across devices, access Microsoft services, and download apps from the Microsoft Store.
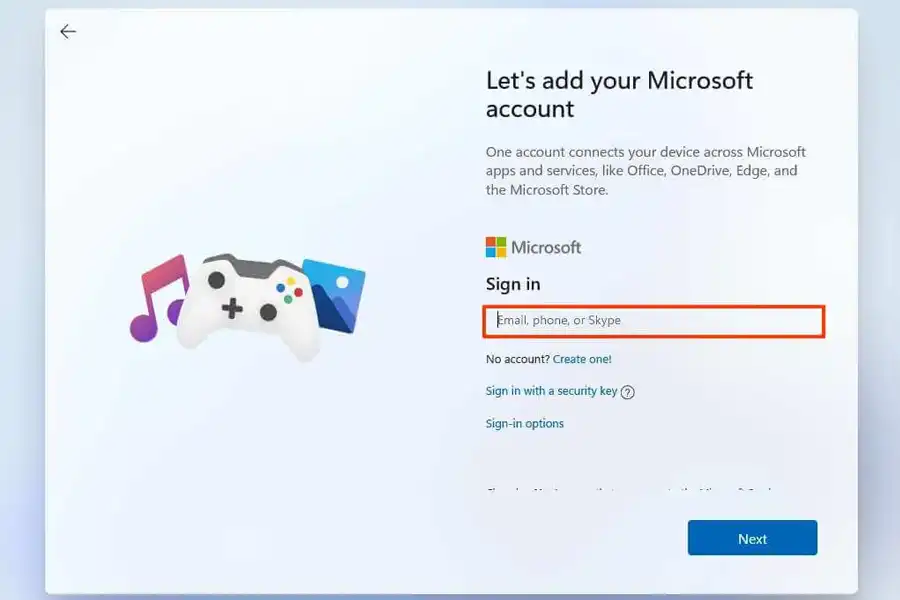
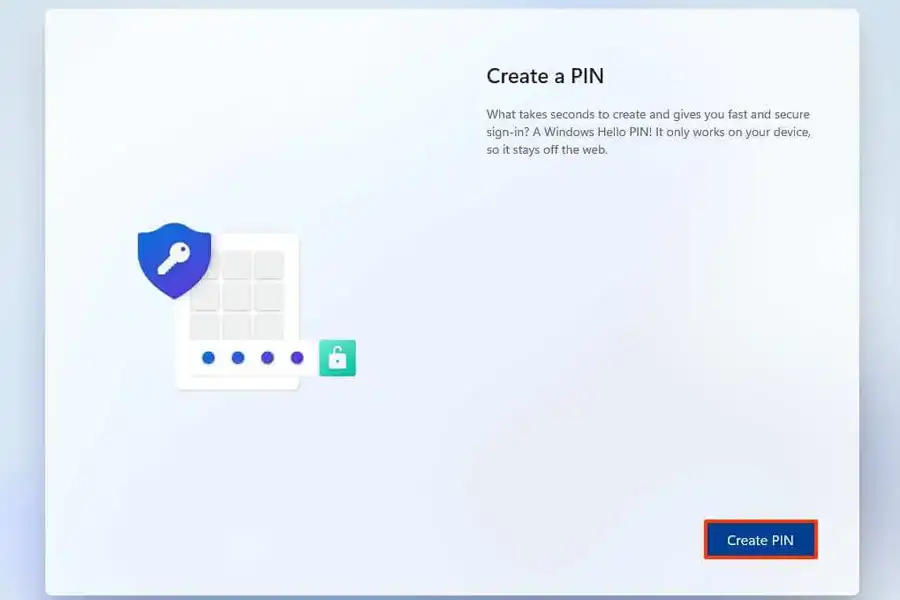
Set up a PIN.
A PIN is a quick and secure way to sign in to your account. It’s especially useful if your PC supports facial recognition or fingerprint scanning.
If your PC has facial recognition or fingerprint capabilities, you can set up Windows Hello for a more secure and convenient sign-in method.
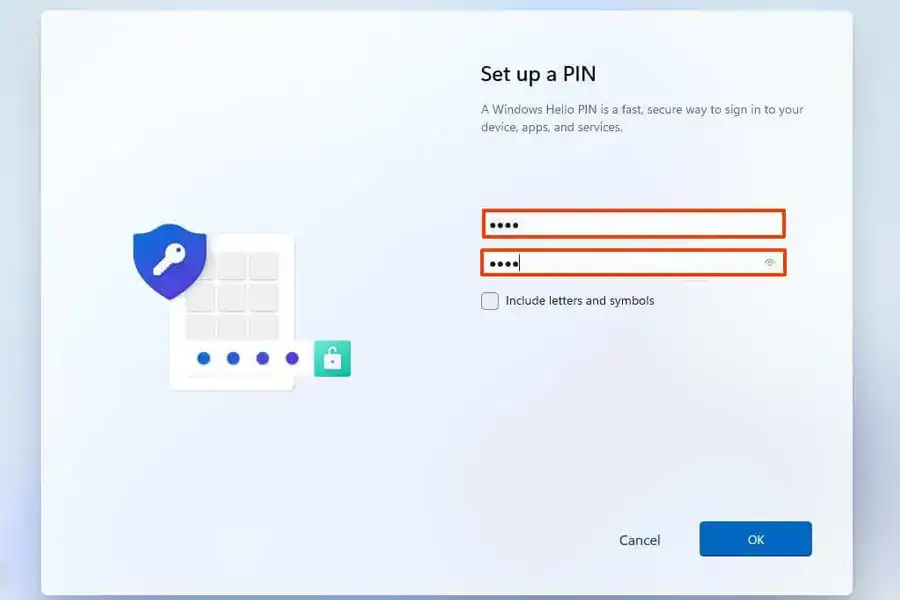
Create a new 4-digit PIN and then click “OK”.
Privacy Settings.
Customize your privacy settings according to your comfort level. Windows 11 offers various options to control how your data is used for features like personalized ads, location services, and more. Take your time to review and adjust these settings and then click “accept”.
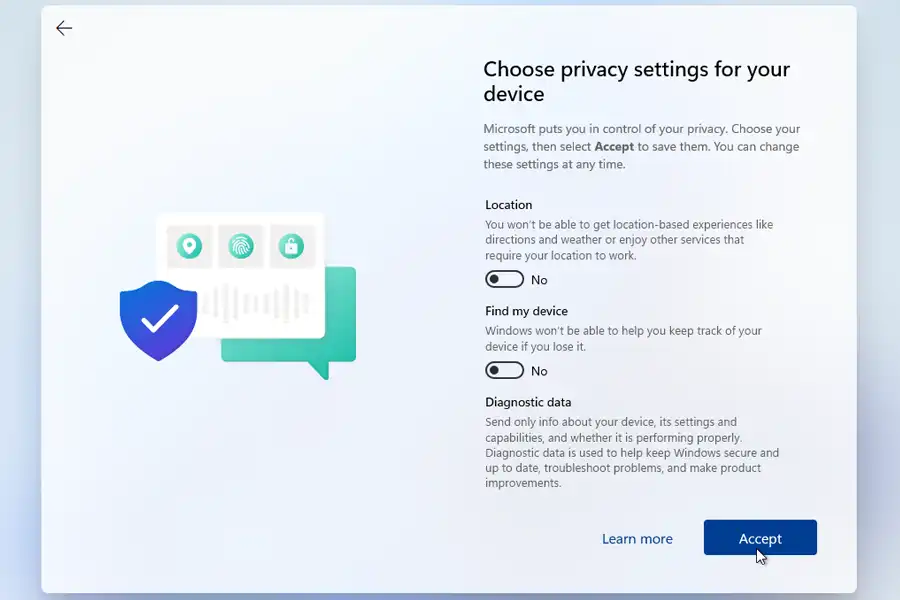
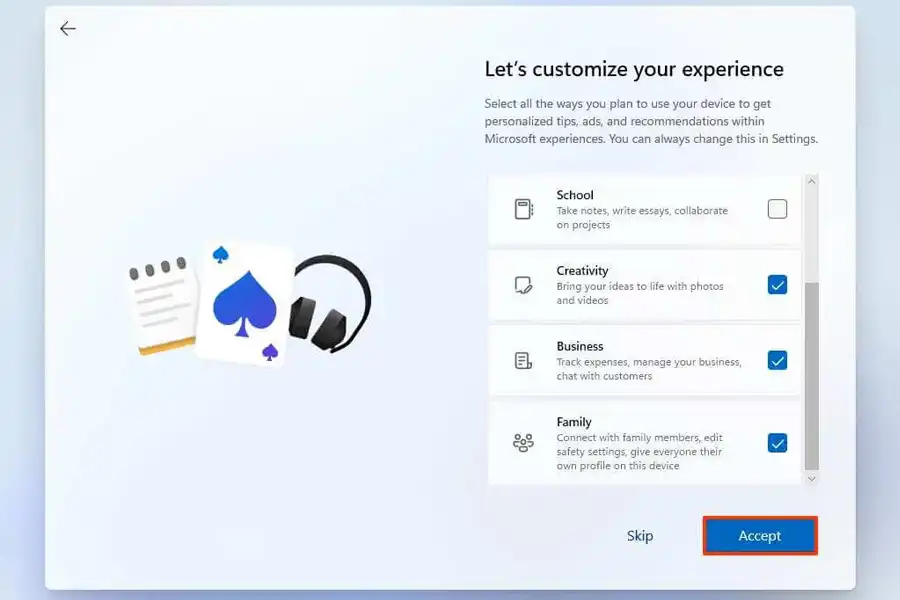
Depending on your selection, Windows 11 will optimize certain settings accordingly.
Click “Accept” to continue or click “Skip” to skip this part.
Windows 11 will now apply your settings and prepare your desktop. Once everything is set up, you’ll be greeted with the stunning Windows 11 desktop, ready for you to explore and enjoy.